https://me-encantas.com/2021/05/18/5-consejos-para-hacer-el-mejor-pan
https://me-encantas.com/2021/05/18/5-consejos-para-hacer-el-mejor-pan is an age-old tradition that combines art and science, yielding delicious results when done right. If you’ve ever wondered how to achieve bakery-quality bread at home, you’re in the right place. In this article, we’ll explore five essential tips to help you bake the perfect bread. Whether you’re a novice baker or an experienced one looking to refine your skills, these tips will guide you to bread-making success.
1. Choose High-Quality Ingredients
The Importance of Quality Flour
Flour is the foundation of any https://me-encantas.com/2021/05/18/5-consejos-para-hacer-el-mejor-pan. For the best results, use high-quality flour. Bread flour, which has a higher protein content than all-purpose flour, is ideal for bread-making as it produces more gluten, giving your bread its structure and chewiness. Look for unbleached, organic flour for the best flavor and nutritional value.
Fresh Yeast for Better Rise
Yeast is a crucial component that makes the dough rise. Using fresh, active yeast ensures a good rise and a light, airy texture. You can choose between active dry yeast, instant yeast, or fresh yeast, but always check the expiration date and store yeast properly to maintain its potency.
Pure Water
Water might seem like a minor detail, but it plays a significant role in bread-making. Use filtered or bottled water to avoid any chemicals or impurities that can affect the taste and texture of your bread.
Salt: More Than Just Flavor
Salt not only enhances the flavor of your bread but also strengthens the gluten structure and controls yeast fermentation. Use fine sea salt or kosher salt for the best results, and measure it carefully.
2. Master the Art of Kneading
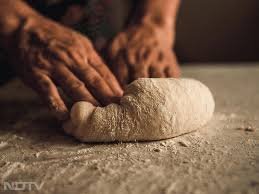
Why Kneading Matters
Kneading is essential for developing gluten, which gives bread its structure and elasticity. Proper kneading transforms the dough from a sticky, lumpy mixture into a smooth, elastic ball.
Techniques for Effective Kneading
There are several techniques to knead https://me-encantas.com/2021/05/18/5-consejos-para-hacer-el-mejor-pan, including hand-kneading and using a stand mixer. Hand-kneading involves pushing, folding, and stretching the dough repeatedly. If using a stand mixer, ensure you use the dough hook attachment and knead at a low speed to avoid overworking the dough.
How to Know When the Dough is Ready
The dough is ready when it becomes smooth and elastic. You can test it by pressing it with your finger – if it springs back, it’s ready. Another method is the windowpane test: stretch a small piece of dough; if it doesn’t tear and you can see through it like a windowpane, the gluten is well-developed.
3. Perfecting the Fermentation Process
The First Rise: Bulk Fermentation
Bulk fermentation is the initial rise after kneading. During this stage, the yeast ferments the sugars in the dough, producing carbon dioxide and causing the dough to expand. Place the dough in a lightly oiled bowl, cover it with a damp cloth, and let it rise in a warm, draft-free area until it doubles in size.
Shaping the Dough
After the first rise, punch down the dough to release excess gas, then shape it according to your recipe. Whether you’re making a loaf, rolls, or artisan shapes, ensure the dough is evenly distributed and smooth to promote even baking.
The Second Rise: Proofing
Proofing is the final rise before baking. Place the shaped dough on a baking sheet or in a loaf pan, cover it, and let it rise again until it has puffed up and almost doubled in size. Proper proofing ensures the https://me-encantas.com/2021/05/18/5-consejos-para-hacer-el-mejor-pan will be light and airy with a fine crumb.
4. Baking to Perfection
Preheating the Oven
A well-preheated oven is crucial for good bread. Preheat your oven to the temperature specified in your recipe, usually between 375°F and 475°F (190°C to 245°C). A hot oven ensures the bread rises quickly and evenly.
Using Steam for a Crispy Crust
To achieve a crispy crust, create steam in your oven during the first few minutes of baking. You can do this by placing a baking dish filled with water on the oven floor or by spritzing water into the oven with a spray bottle. The steam helps to keep the crust moist and allows it to expand before becoming crisp.
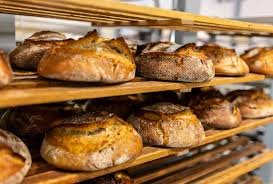
Knowing When Your https://me-encantas.com/2021/05/18/5-consejos-para-hacer-el-mejor-pan is Done
Bread is done when it has a golden-brown crust and sounds hollow when tapped on the bottom. You can also use a food thermometer to check the internal temperature; it should read around 190°F to 210°F (88°C to 99°C) depending on the type of bread.
5. Cooling and Storing Your Bread
The Importance of Cooling
Allowing bread to cool completely before slicing is essential. Cooling on a wire rack prevents the bottom from becoming soggy and allows the steam to escape, resulting in a better texture.
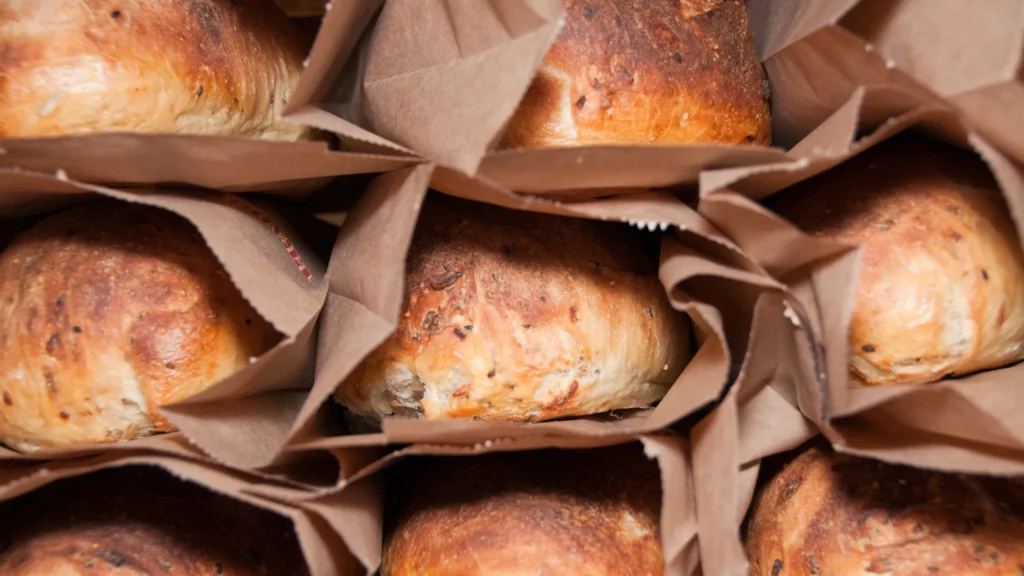
Proper Storage Techniques
To keep your bread fresh, store it in a bread box or a paper bag at room temperature for up to a few days. For longer storage, wrap it tightly in plastic wrap or aluminum foil and freeze it. Avoid refrigerating bread, as this can make it stale faster.
Reheating and Refreshing
If your bread becomes a bit stale, you can refresh it by reheating it in the oven. Spritz the loaf with a bit of water and place it in a 350°F (175°C) oven for about 10 minutes. This will help restore some of its original freshness and crispiness.
Conclusion
Baking the perfect bread at home is a rewarding and enjoyable experience. By using high-quality ingredients https://me-encantas.com/2021/05/18/5-consejos-para-hacer-el-mejor-pan, mastering kneading techniques, perfecting the fermentation process, baking to perfection, and properly cooling and storing your bread, you can achieve bakery-quality results in your own kitchen. So, roll up your sleeves, dust off your apron, and start baking the best bread you’ve ever made!
Additional Tips and Tricks
Experiment with Flavors
Don’t be afraid to experiment with different flavors and ingredients. Add-ins like herbs, seeds, nuts, dried fruits, or even cheese can take your bread to the next level. Just remember to incorporate these additions during the shaping stage to ensure they are evenly distributed.
Understand Different Types of Bread
There are countless types of bread, each with its own unique characteristics and techniques. Whether you’re making a classic white loaf, a hearty whole grain bread, or a rustic sourdough, understanding the specific requirements of each type can help you achieve the best results.
Learn from Each Batch
Bread-making is both an art and a science, and sometimes it takes a few tries to get it just right. Keep notes on your process, including ingredient measurements, kneading times, rise times, and baking temperatures. Analyzing your successes and failures will help you improve your skills over time.
Join a Baking Community
Joining a baking community, whether online or in person, can provide valuable support and inspiration. Share your experiences, ask for advice, and learn from others who share your passion for bread-making.
By following these essential tips and continuously refining your techniques, you’ll be well on your way to mastering the art of bread-making. Enjoy the process, savor the results, and delight in sharing your homemade bread with family and friends.
FAQs
1. Why is it important to use high-quality ingredients in bread-making?
High-quality ingredients are essential for achieving the best results in bread-making because they directly impact the texture, flavor, and nutritional value of the bread. For example, bread flour with a high protein content helps develop more gluten, giving the bread structure and chewiness. Fresh yeast ensures a good rise, leading to a light and airy texture, while pure water and fine sea salt contribute to the bread’s overall taste and consistency.
2. What are the key steps to ensure proper fermentation in bread-making?
Proper fermentation is crucial for developing the bread’s flavor and texture. The key steps include:
– Bulk Fermentation:Allow the dough to rise in a warm, draft-free area until it doubles in size. This first rise is critical for developing the dough’s flavor and structure.
– Shaping:After the first rise, punch down the dough to release excess gas, then shape it according to your recipe.
– Proofing:The second rise or proofing ensures that the shaped dough puffs up and almost doubles in size before baking, resulting in a light and airy loaf with a fine crumb.
3. How can I achieve a crispy crust on my homemade bread?
To achieve a crispy crust, create steam in the oven during the first few minutes of baking. This can be done by placing a baking dish filled with water on the oven floor or by spritzing water into the oven with a spray bottle. The steam keeps the crust moist, allowing it to expand before becoming crisp. Additionally, ensure the oven is preheated to the correct temperature to help the bread rise quickly and evenly.